How to build a Clay Pizza Oven – Oven Floor
So let’s start with the material for the oven floor. Continuing on my theme of simple and cheap I was originally going to use paving slabs. I had four lying around and it just seemed the obvious choice. Then I got to thinking, would the slabs be able to handle the high temperatures. Also how much heat would I loose through the base. 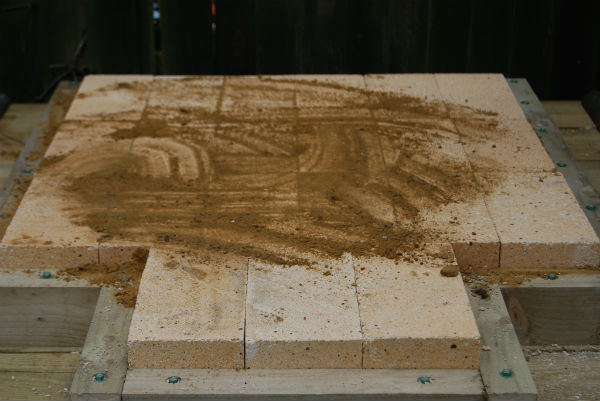 But more importantly, one of the success factors to a good pizza, is the surface you cook on. It needs to get hot enough to give that all important crust. Apparently it is all to do with steam and moisture being drawn out of the dough, just look at all the pizza stones you can now buy. So you guessed it, I abandoned my original idea and decided to buy proper fire bricks. They weren’t cheap, but I am glad I did as they make all the difference. When you drop a pizza on the hot base and see it instantly expand, and cook in front of your eyes it is really cool. The brand of brick I went with for the oven floor were Vitcas Fire Bricks.
This now brings us to the size of the oven floor. If you think about it, the size of the oven floor ultimately defines the size of the whole oven. This is because you build on top and around the base. You also need to think about what you are going to use the oven for, just pizza’s or for cooking a Sunday roast? Also how much do you want to cook at a time, for instance do you want room to cook several pizza’s? You also have to consider the heating time, the bigger the oven the longer it will take to warm up.
There are lots of references on the Internet to the correct size for the oven floor and all are different. I ignored all this information and went with what worked best for me. I decided I needed room to cook just one pizza at a time with enough space to have a fire still burning at the same time. Once the oven is at the correct temperature it only takes a couple of minutes to cook a pizza so I decided on a base size of Y x Z.
I built the oven floor by first laying the bricks on the base I had previously built. When I was happy with the position, I built a simple wooden frame around the bricks to hold them in place. When I say simple, I mean simple, just rough pieces of wood (pressure treated) screwed into the base. This also has the added advantage of bonding the base sleepers together. I removed the bricks out of the frame as I wanted to set the bricks on a layer of sand. The reason for this, I wanted a completely flat cooking surface with no raised bricks.
Now this is where I over engineered things, but I did it simply and I wanted to do a proper job. I was convinced over time the sand would fall through the cracks in the sleepers. 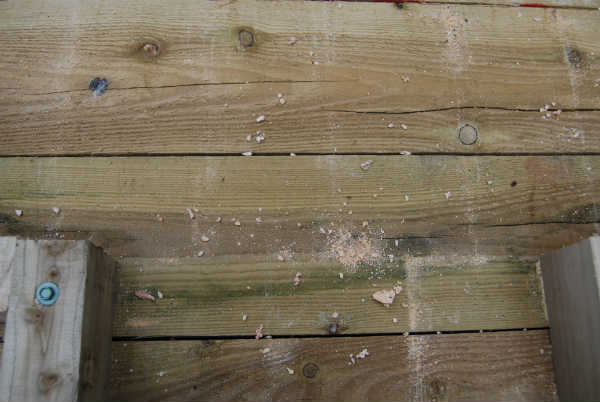 This would then lead to the bricks moving and possibly the sleepers moving apart. To get around the problem I put a piece of strong insulation foil I had lying around the garage on top of the sleepers.
Next I was concerned that the sand would pierce the insulation material and the sand would still drop through into the cracks so I then put down some pressure treated wood on top, this time going in a perpendicular direction to the direction the sleepers were laid. Yes you’ve guessed it! I then covered this in another layer of insulation. Unfortunately I didn’t have much left so I used good quality kitchen foil (but don’t tell the wife!). 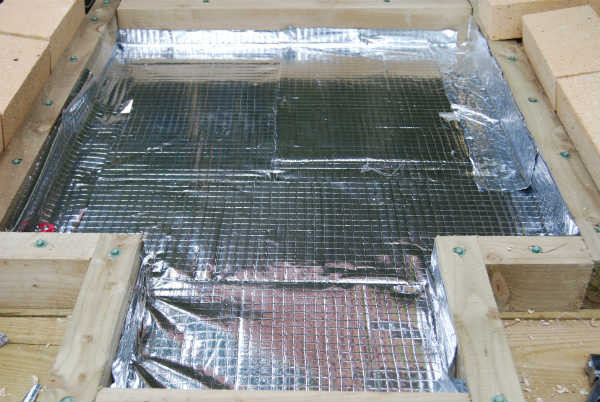 Finally I covered this in sand which I made smooth and level. Next, I put the bricks back in the frame and slowly tapped them into the sand, making sure I had a completely flat surface. The last thing I did was brush fine sand in-between the bricks to lock and hold them in place.
OK as I said, over engineered, but it was quick and simple to do. Also I now have a solid firm base with excellent insulation properties.
======================= STOP PRESS UPDATE ===========================
That last statement is complete and utter rubbish! Hands Up – I cocked up here. This was a poor design for the base and I will tell you why. “That last statement is complete and utter rubbish! Hands Up – I cocked up here”It would be easy for me to rewrite the above section to save face, but I will keep it here so you can learn from my mistakes. As I say “there is nothing wrong with making a mistake when doing something new, as long as you learn from that mistake”
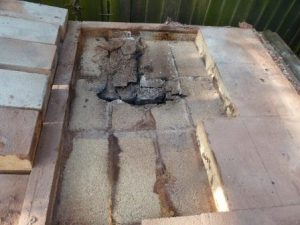
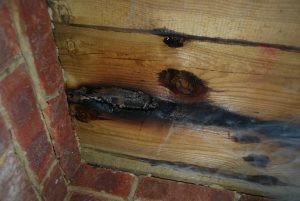
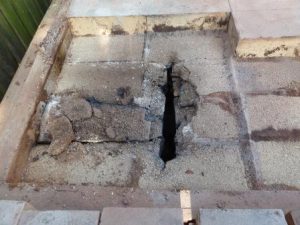
So what went wrong? Well I completely underestimated how hot these ovens get, two of the sleepers got so hot they started to smoulder. In hindsight I should have gone for thicker insulation and proper fireboard insulation. I had used the oven the night before and the next morning I came down to see a small smoke trail coming from under the oven. I put the hose on it and it was soon out. It wasn’t a major fire but I was no longer able to use the oven. I have now decommissioned this oven and will soon work on oven number two, with superior insulation for the base. In the meantime checkout my disaster pictures below:
====================== STOP PRESS UPDATE END ========================
Any questions on this part of the build or if you want to share your experiences with a similar build, then use this link to contact me or select the contact tab at the of this page.
OK, you are now ready to make the oven itself which can be found here Core Oven. Or take some time to look pictures I took of this part of the build. Click to see them in more detail.
Series Link
1. Design
2. Base
3. Oven Floor
4. Core Oven
5. Entrance & Chimney
6. Insulation
7. Protecting the Oven
8. Lessons Learnt
9. Living with the Oven
10. Conclusion and what’s next
Recent Comments