Build your Clay Oven – The Base
First let’s start with the base or the plinth. Remember this needs to be strong as it will be supporting a heavy weight. Also, you want the oven high enough so that you are not constantly bending down when you are cooking a pizza. I thought I had built my plinth high enough, but I still find it back breaking when I am cooking 10 pizzas or more. So tip1, build the oven base high.
 Before you start the plinth you need to think about the foundations, let’s face it you don’t want a “Leaning Tower of Pisa” structure. I already had a fairly solid patio and decided to take the risk of building straight on top of this and so far I have had no issues and the foundations are holding up.
Next you need to build the plinth and this is all about doing things simply. I had originally planned to use wooden railway sleepers as I thought this would be quick and simple to build. There are lots of places on the internet where you can order these for delivery or an easier option (although it’s a bit dearer) is to get them from the local DIY store where you can pick them up in four foot length’s which are easy to transport.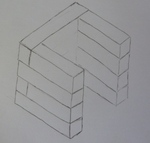 My original plan had been something like the the drawing on the right:
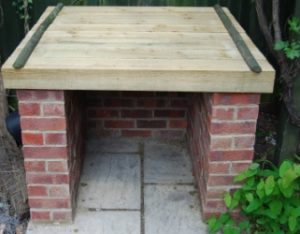
However I decided against sleepers in the end and went with a brick plinth. I had recently had an extension and salvaged the bricks from when the external wall was knocked down. It made sense to use these as it would help the oven blend in with the house, but also it saved me money as I didn’t have to buy the sleepers. I won’t teach you how to do the bricklaying, as there are plenty of examples on the internet, as always just do it! The main difference between you and a professional bricklayer is you will be slower, but your results will be sufficient for your needs. If your lines are not quite right, it all adds to the charm, and gives it that ‘Old Rustic’ look. Checkout the pictures of mine and tell me it isn’t cool.
After I had built the brick sides, I decided to make the top out of sleepers. Once again I went for the quick and simple solution. I also thought the wood would have good thermal properties and would act as insulation for the underneath of the oven. I brought pre-cut sleepers of four foot from Wickes, which I was able to bring home in the car. I screwed some of these together to give added strength and then bedded them on mortar on top of the brick walls. To make sure they stayed in place, I half sunk screws into the wood which then bonded into the mortar. You can see this in the slide show below.
Note, I kept the front of the base open as I planned to use it as a storage place for logs, but the dogs often use it as a kennel. On a hot summer day it makes a lovely cool shady spot.
You are now ready to go to the next stage The Oven Floor, or why not spend a little more time on this page looking through the slide show of pictures taken during the building of the base.
Series Link
1. Design
2. Base
3. Oven Floor
4. Core Oven
5. Entrance & Chimney
6. Insulation
7. Protecting the Oven
8. Lessons Learnt
9. Living with the Oven
10. Conclusion and what’s next
Recent Comments