Build your own Clay Pizza Oven – The Core Oven
Now I thought I knew everything about building a clay oven. I had done loads of research on the internet and read two books on the subject. So I knew the ideal size, shape and clay mixture. But to be honest the best thing I did was just build a small trial version first or a Muffin Oven as I called it. I learnt loads building the Muffin Oven, and realised that most of the stuff I thought I knew was rubbish. I was going to put all my findings here, but I have now collated them in the lessons learnt section later. Personally I think all you need to do is read this series and build your own Muffin Oven and you will then have all the knowledge and skills needed to build the main Oven.
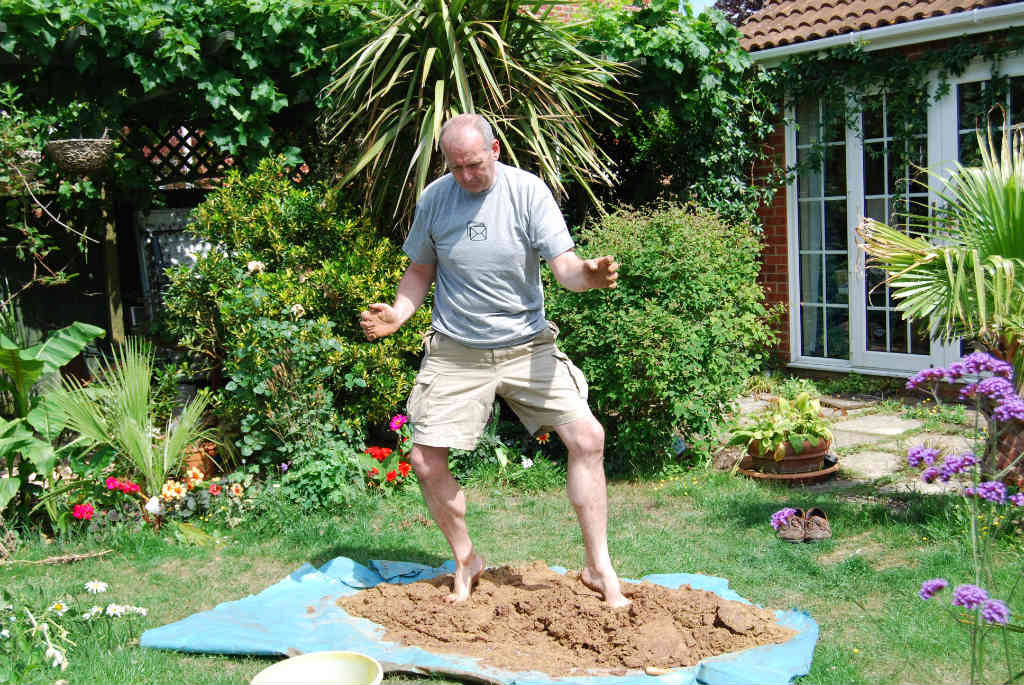
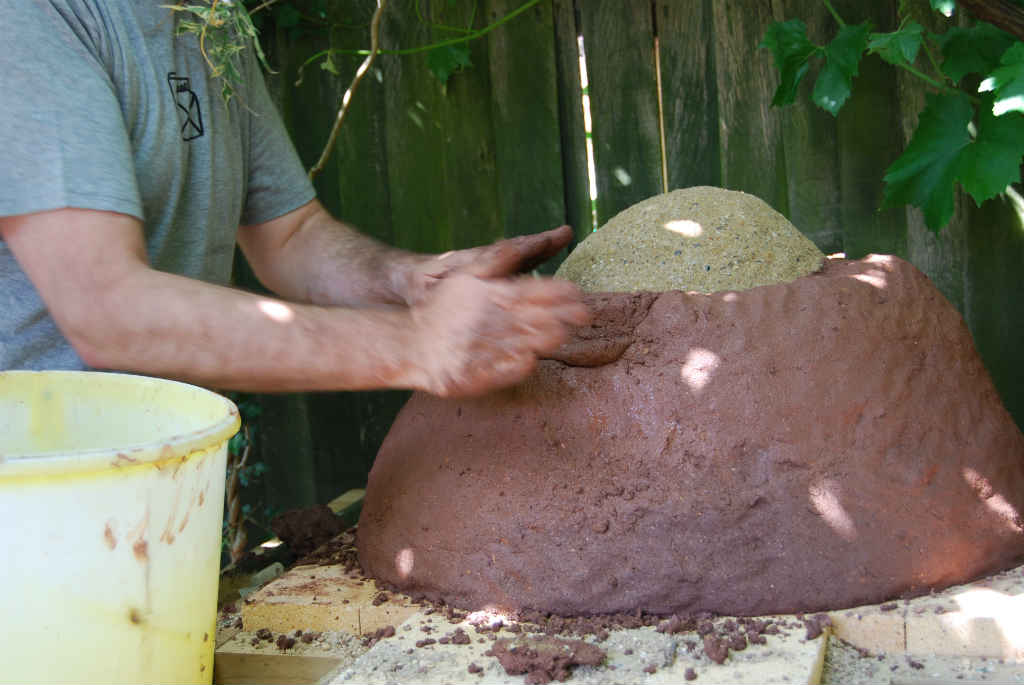
 So let’s get started, first you need to build a big sand dome, which will be the size of the inside of your oven. OK nothing fancy here, just a plain old dome like you have done on the beach many a time before.
I used standard sharp sand which is sold at all DIY stores. It helps if it is a bit damp as you can build the dome higher. Make sure you keep patting and compressing the sand so you have a solid structure to support the clay skin. You will see lots of references to covering the sand dome in strips of wet paper. You can see some pictures where I have done this, the first two domes I made I covered in paper, but from then on I left the sand naked. The paper was always so fiddly and constantly blowing off on a hot day, I just didn’t see the point in it. So leave your sand dome as it is and you are now ready to cover in a clay skin but first you need to make the clay mix.
Sand and Clay mix
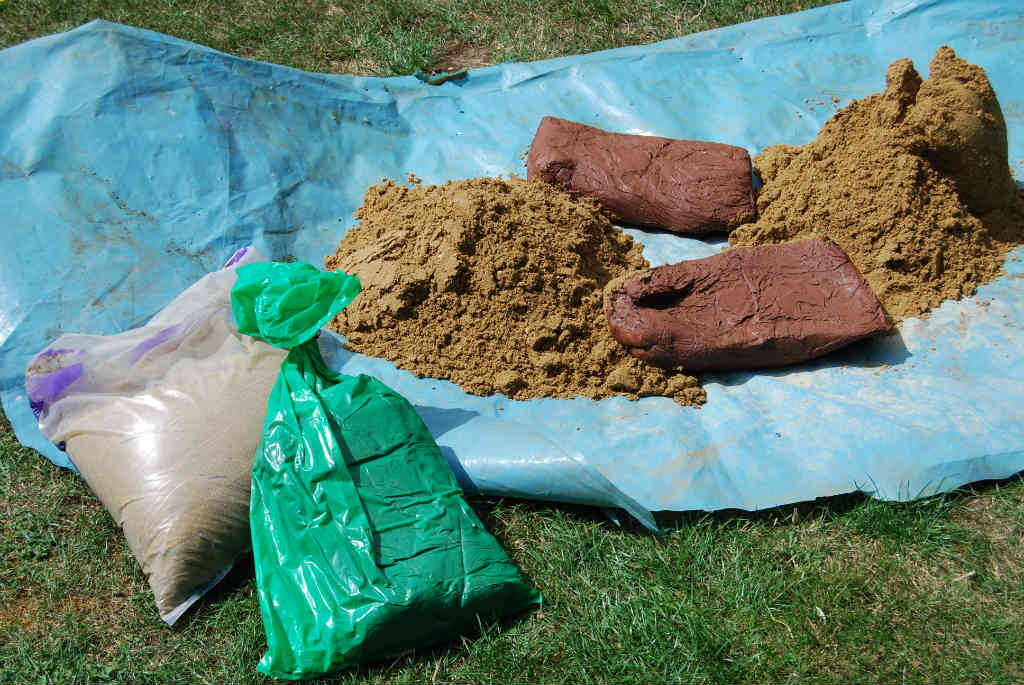
Your clay mix is simply clay and sand mixed together. The sand is mixed in to give it strength and stop the clay from cracking. I used the same sand I used for the dome, and for the clay there are lots of places on the internet you can buy it from or if you live in a clay area you could just dig up your own clay, but I thought that sounded like too much hard work. Also what would the quality be like and would it crack easily? I know as a kid when I used good old London Clay from the garden it used to crack easily. I went for the easy option and sourced mine from the same place the local school use at £3.69 for a 12.5 kg bag of Terracotta Clay.
I had read lots of stories about the clay cracking on peoples clay ovens, and I didn’t want that on mine so I went for a good quality clay that would look good, but more importantly last a long time and at only £3.69 a bag I thought it was worth the expense. As before, lots was learnt during the mixing phase, which I have documented in the lessons learnt section.
-

- clay and sand
-
- add sand to the clay
-
- do the twist
-
- clay and sand mixed
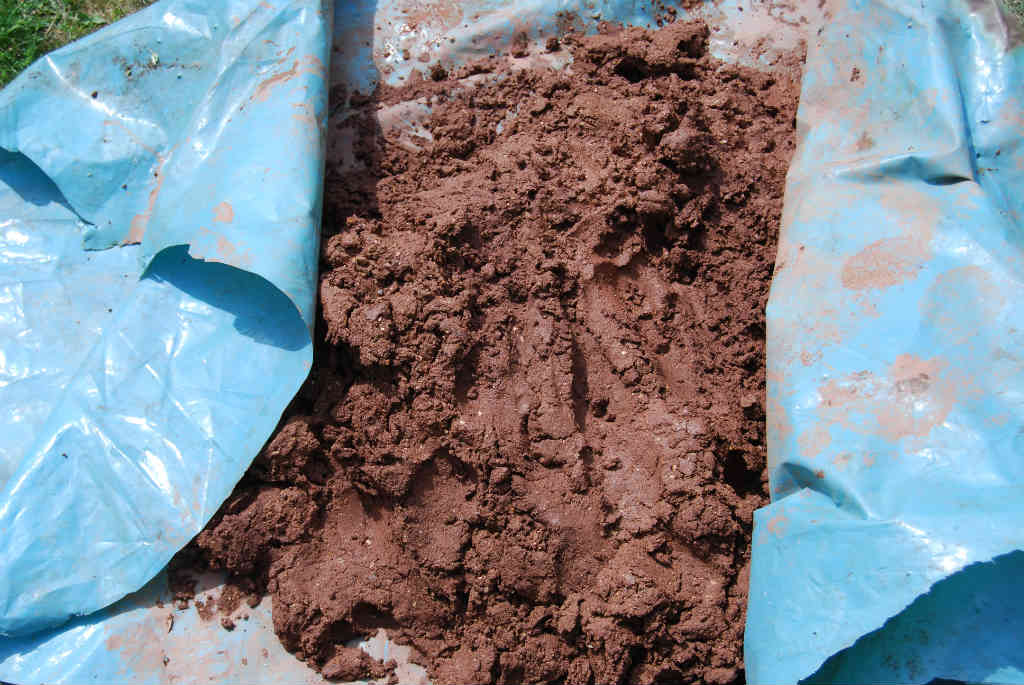
To make the mixture I used 1 part clay and 2 ½ – 3 parts sand. I laid out a piece of tarpaulin and cut the clay into small chunks. Now I can’t remember the exact number, but I think I used four bags of clay. It is best to make more mixture than you need, as there is nothing worse than running out of the clay mix when you are covering the dome. Don’t worry about having clay left over as you will use that in the insulation phase.
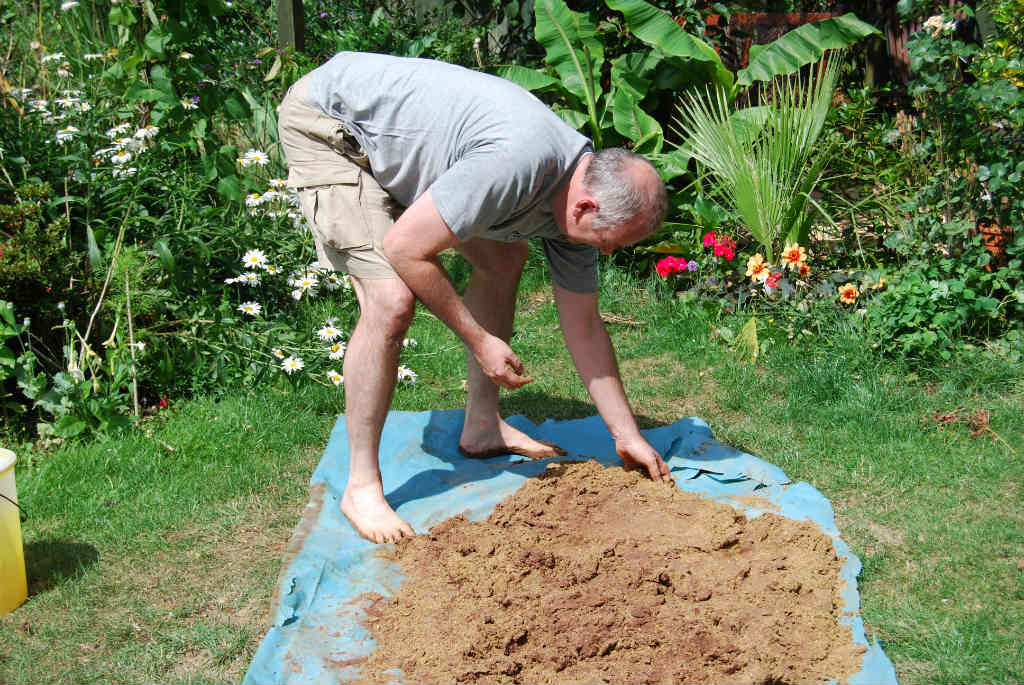
Now start adding the sand to the clay pieces on the tarpaulin, I would start with just one bag. Next you need to mix the clay and sand together and I did this by taking my shoes off and getting down and dirty in the mix. Basically I started dancing in the mixture, and the twist is the best move to do. When you start you think the sand is never going to mix in, but it soon
disappears and when it does add more sand. You are aiming to get all the sand mixed in, so you can’t see it anymore. You want the final mix to be firm, but not to crack when you handle it. As I said previously, the classic mud pie you made as a kid, or did you make sloppy pies?
OK, so you are asking yourself, what does firm really mean? One man’s firm is another man’s floppy. I use the following two classic tests:
- First roll out the clay to make a rod, which when held out should bend but not crack. Basically you are testing to make sure the mixture is not too dry and can hold together without breaking.
- The second test is to make a cricket ball shape of mixture and then drop to the ground, which should keep its rough shape. A wet mixture will become a pancake.
Don’t get hung up on the mixture consistency. Ultimately you are going to make brick shapes which you are going to put around the dome. They need to be able to keep their shape but be wet enough to bond to the adjacent bricks. Go with your instincts or better still build a Muffin Oven and see how well your mixture holds up, also you can add water during the mixing phase if it looks dry. One of the advantages of using the tarpaulin is that you can easily turn the mixture by lifting one end and folding over. I have a confession to make, I only used the tarpaulin for the first two ovens. For subsequent domes and insulation mix, I used a children’s play pit and garden spade. This was a lot easier and not so messy.
Modelling the Clay Oven
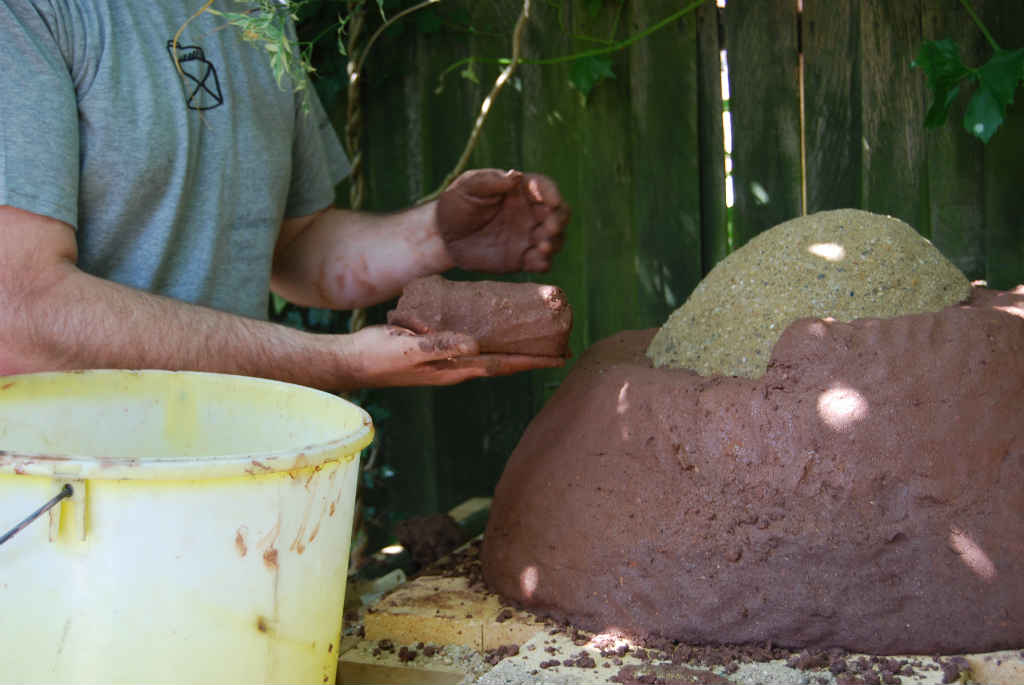
So we have our dome and we have our clay mixture, lets now cover the dome. Grab a chunk of the clay mixture and in your hands make a basic brick shape. Keep patting it with your hands to make it firm and get rid or any bubbles. I suppose a bit like making a butter pat. It is up to you what size bricks you make, but you need to consider the size of the oven wall. I made my oven wall roughly 3” ( 8 cm ) thick.
-
- mould a clay brick
-
- add brick to the oven
-
- smooth in
-
- How easy was that?

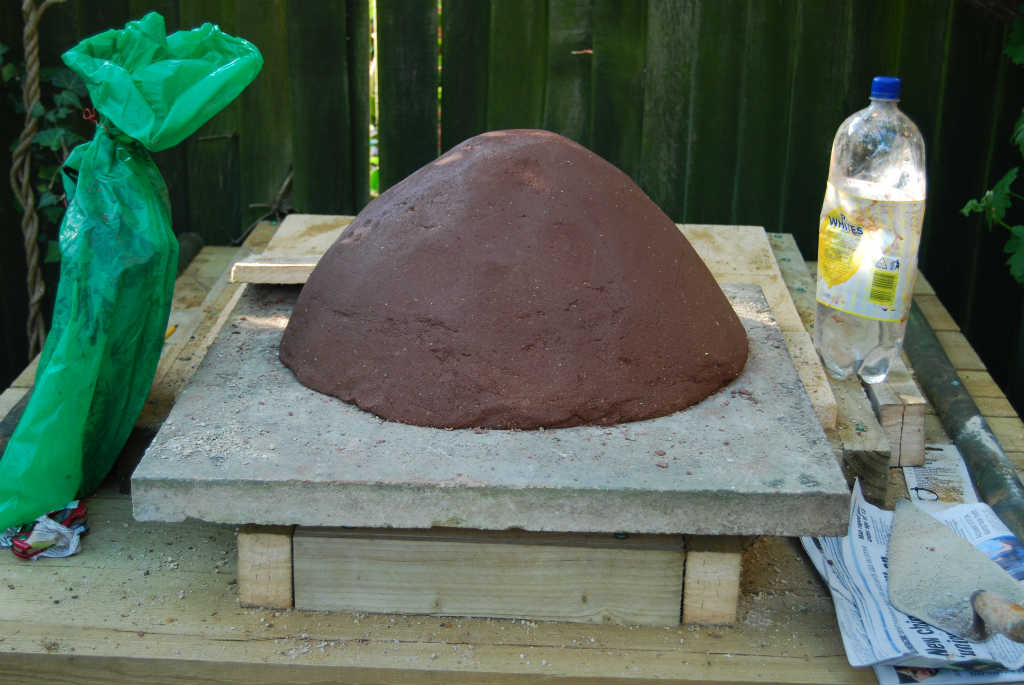
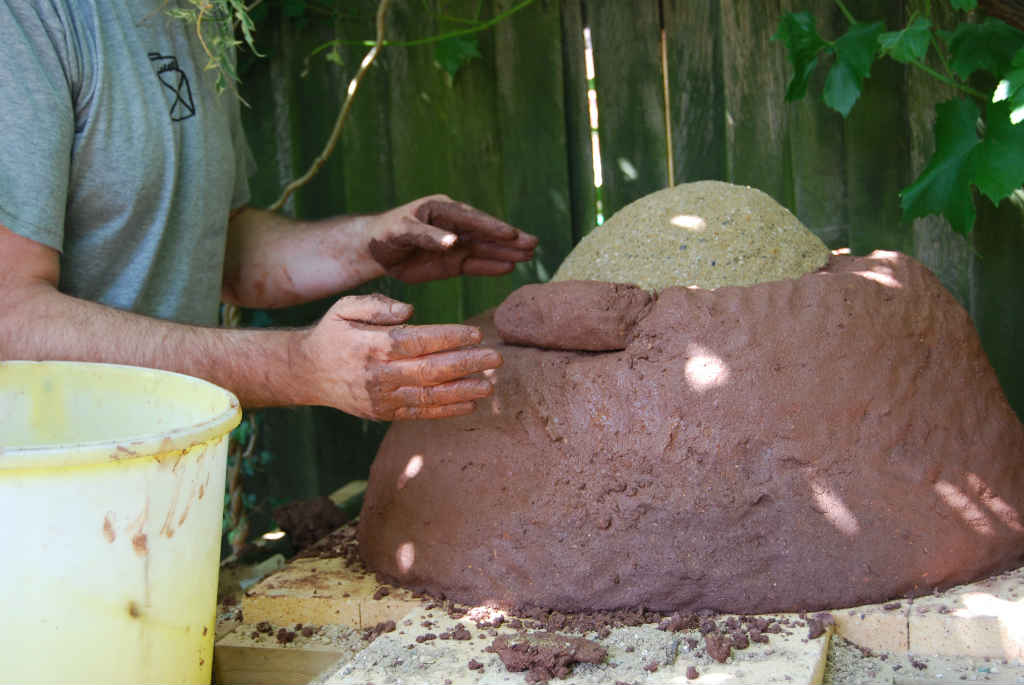
Once your brick is ready, place it at the bottom of the dome, but firmly against the sand. Continue making more bricks and placing these firmly against the sand and the adjacent brick, continuing until the whole sand dome is covered. I should point out that I constantly patted the sides to make sure the wall is firm and the bricks bonded together. This is very therapeutic, but a piece of wood is good for this if you have some aggression to release. Once complete I covered the dome in a piece of tarpaulin to protect it and left the mound for 24 hours to dry. It doesn’t dry in 24 hours, but it makes the walls firm enough to go to the next stage.
 After 24hrs cut a hole for the opening and scoop out the sand. Now you could use one of your wife’s kitchen knives, but the walls are still soft, so I used a pallet knife. I cut the opening the width of my 3 brick entrance or in other words the size of my intended pizza’s. I made the height 63% of dome height, see lessons learnt. After I had scooped out the sand I left it another 24 hours to harden a bit more with the air now getting to the inside.
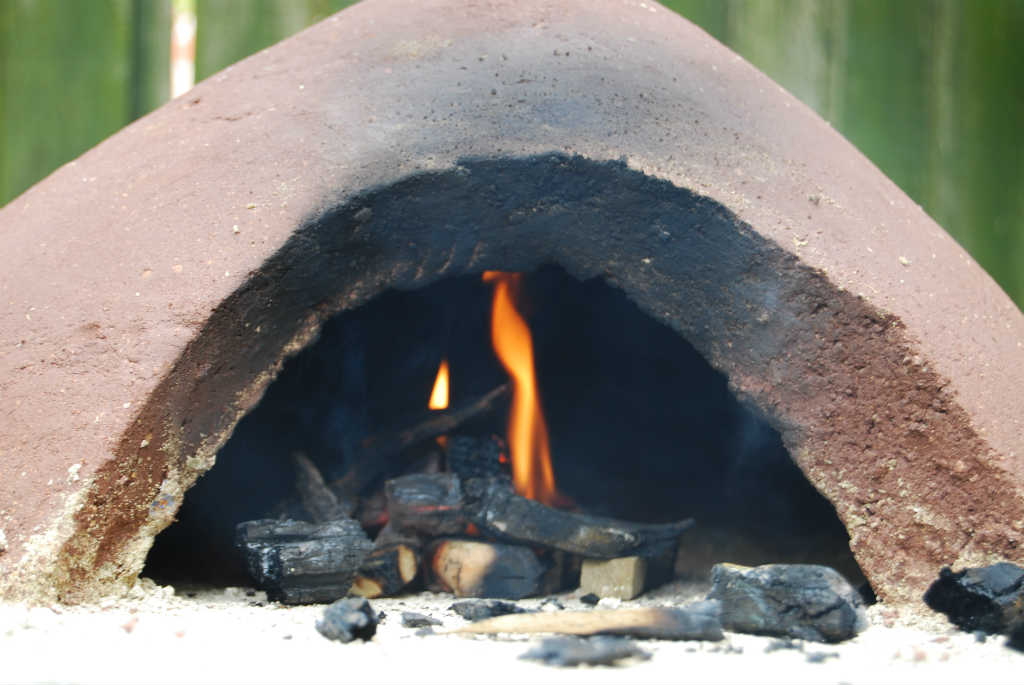
You finally get to one of your major milestones which is lighting your first fire in the oven. Start with a few pieces of kindling in the open arch, and once established start slowly pushing back into the oven whilst adding more kindling. When you have an established fire going inside the oven, start adding bigger pieces of wood such as logs. I went easy on this first fire, basically enough heat to speed up the drying phase without the risk of cracks.
======================= STOP PRESS UPDATE =================================
When I built the oven I surprised how many experts I suddenly knew who were constantly giving me advice on the core clay
oven. They all told me how the oven would crack because of moisture getting in, and this would be a particular problem in the winter with ice. Also you should heat up the oven slowly to drive out the moisture. Basically they were telling me that the clay oven wouldn’t last and would not make it through the winter. Funny how none of these experts had actually built a clay oven before, nor did they know anyone that had. The bottom line is you are the expert, you have done your research to go with what you have learnt and your gut feeling. I know how these people can plant that thought in the back of your head, which then keeps nagging away.
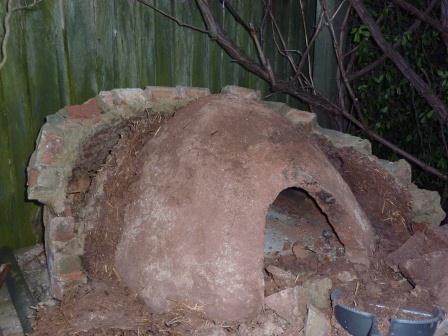 Well I have now decommissioned the oven and the picture on the right was taken nearly two years after I built it and you can see there are no cracks. Also checkout the decommissioning video which shows it in more detail. It’s first winter was the coldest on record, where we regularly had -15. I even have pictures of us having a pizza party with snow and ice on the oven. SO ignore the doubters and go with your gut feeling “Just Do IT”
===================== STOP PRESS UPDATE END ==================================
Now you are ready to go to the next section, building the oven entrance and adding a chimney, or look at more detailed photo’s below:
Series Link
1. Design
2. Base
3. Oven Floor
4. Core Oven
5. Entrance & Chimney
6. Insulation
7. Protecting the Oven
8. Lessons Learnt
9. Living with the Oven
10. Conclusion and what’s next
Recent Comments